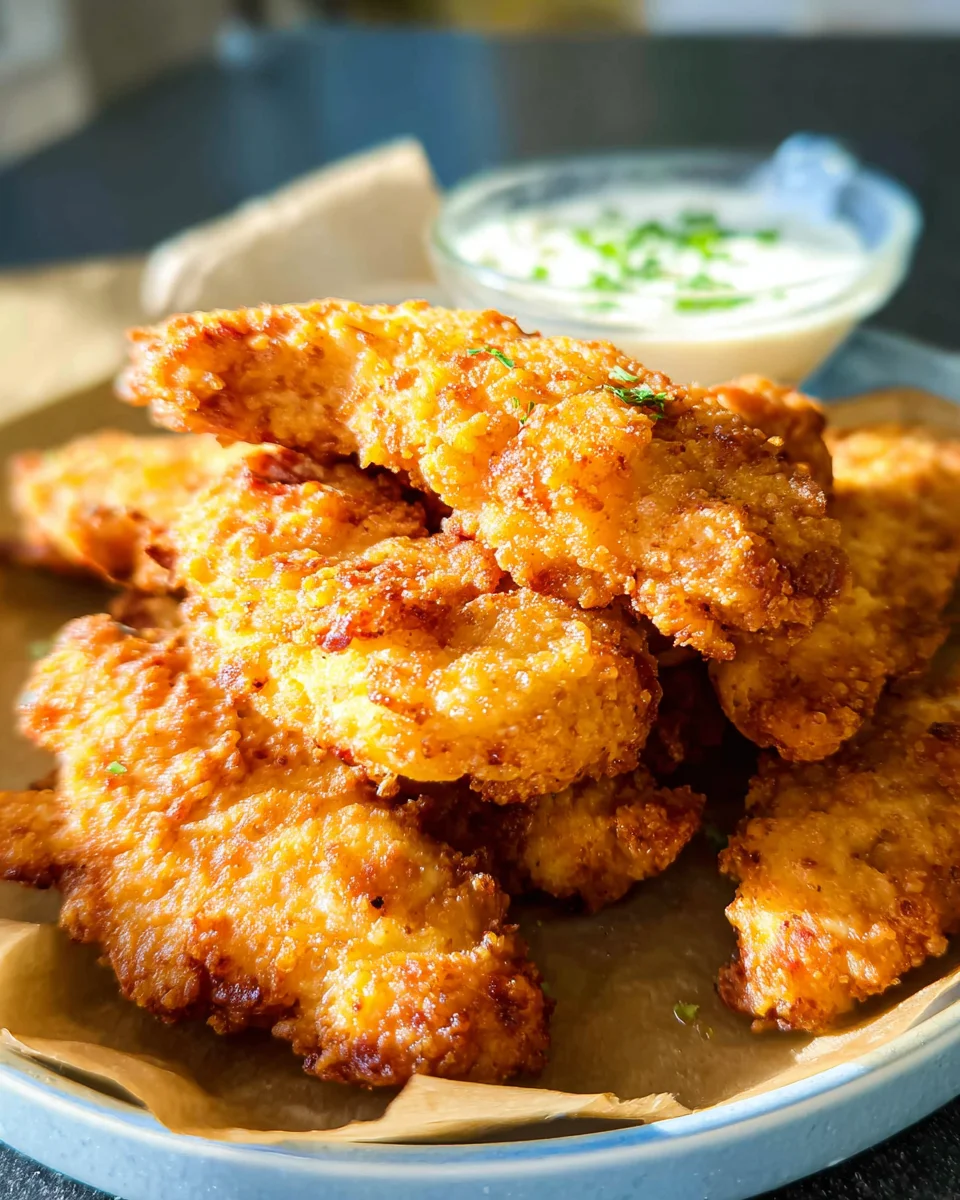
If you’re searching for a delightful and quick meal that everyone will adore, look no further than Homemade Chicken Tenders. These crispy, flavorful tenders are perfect for family dinners, game nights, or even as a tasty snack. With simple ingredients and easy preparation, you can whip up this crowd-pleaser in no time.

Jump to:
- Why You’ll Love This Recipe
- Tools and Preparation
- Essential Tools and Equipment
- Importance of Each Tool
- Ingredients
- How to Make Homemade Chicken Tenders
- Step 1: Prepare the Coating Mixtures
- Step 2: Heat the Oil
- Step 3: Dredge the Chicken Tenders
- Step 4: Fry the Chicken Tenders
- How to Serve Homemade Chicken Tenders
- With Dipping Sauces
- In a Sandwich
- On a Salad
- As an Appetizer
- How to Perfect Homemade Chicken Tenders
- Best Side Dishes for Homemade Chicken Tenders
- Common Mistakes to Avoid
- Storage & Reheating Instructions
- Refrigerator Storage
- Freezing Homemade Chicken Tenders
- Reheating Homemade Chicken Tenders
- Frequently Asked Questions
- How do I make Homemade Chicken Tenders gluten-free?
- Can I use chicken breasts instead of tenderloins?
- What sides pair well with Homemade Chicken Tenders?
- How do I know when my chicken is done?
- Final Thoughts
- 📖 Recipe Card
Why You’ll Love This Recipe
- Quick to Prepare: This recipe takes only 18 minutes from start to finish, making it ideal for busy weeknights.
- Family-Friendly: Kids and adults alike love chicken tenders, ensuring a happy dinner table.
- Customizable Flavor: Adjust the spices or sauces to make them your own! Try different seasonings or serve with various dipping sauces.
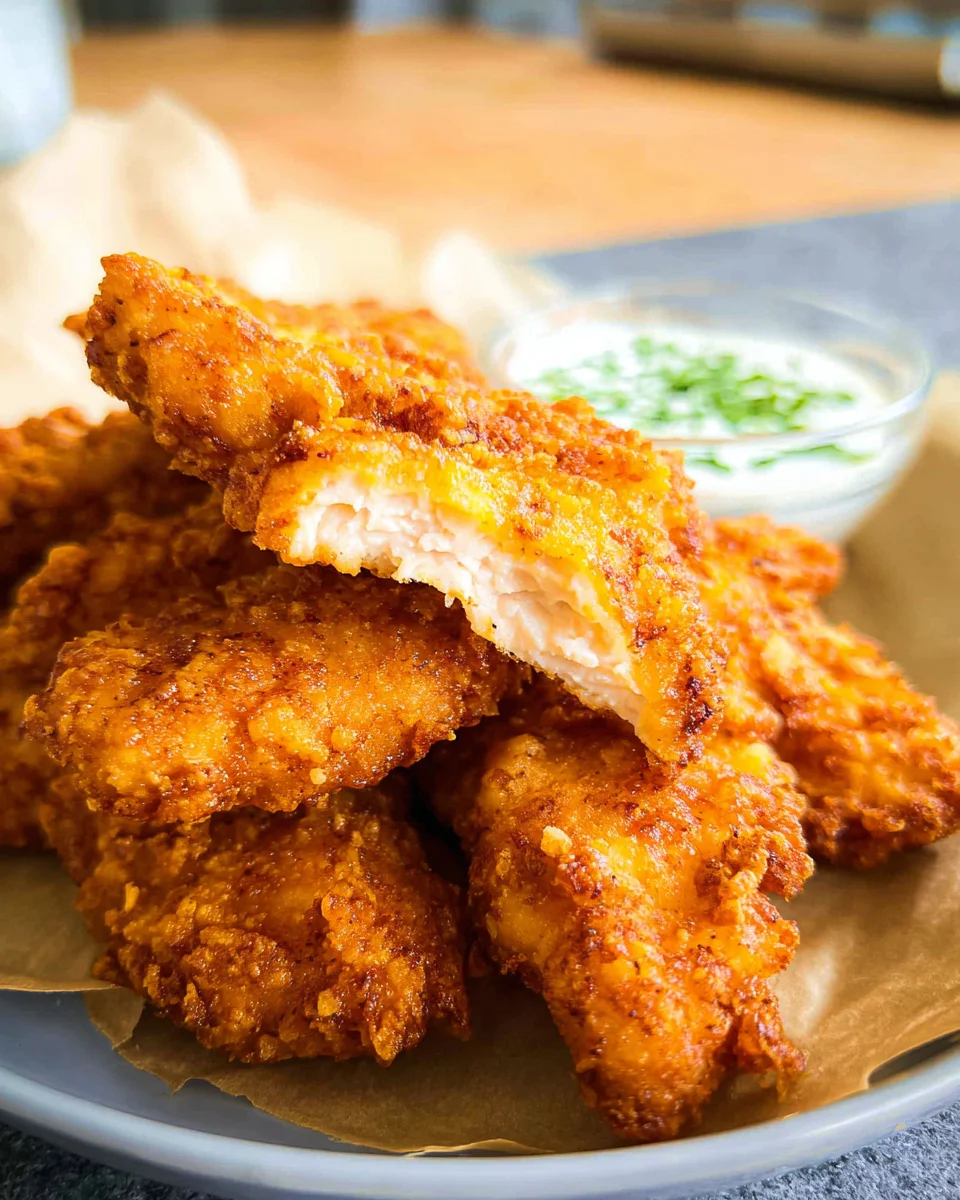
- Perfectly Crispy: The double coating technique gives these tenders a satisfying crunch that you won’t be able to resist.
- Versatile Meal Option: Enjoy them on their own, in sandwiches, or as part of a salad for a complete meal.
Tools and Preparation
Before diving into the cooking process, gather your tools. Having everything ready will make your experience smooth and enjoyable.
Essential Tools and Equipment
- Heavy-bottom skillet or Dutch oven
- Mixing bowls
- Whisk
- Wire rack
Importance of Each Tool
- Heavy-bottom skillet or Dutch oven: Ensures even heat distribution while frying, preventing burns and undercooked spots.
- Mixing bowls: Essential for combining dry ingredients separately from wet ones, leading to better flavor integration.
- Whisk: Helps achieve a smooth mixture when combining buttermilk, egg, and hot sauce.
- Wire rack: Allows excess oil to drain off after frying, keeping your chicken tenders crispy.
Ingredients
For these delicious Homemade Chicken Tenders, you’ll need:
- 1 lb chicken tenderloins
- 1 cup all purpose flour
- 1 tsp baking powder
- 1/2 tsp kosher salt
- 1/2 tsp black pepper
- 1/2 tsp garlic powder
- 3/4 cup buttermilk
- 1 large egg
- 2 teaspoons hot sauce
- Oil for frying
How to Make Homemade Chicken Tenders
Step 1: Prepare the Coating Mixtures
In a medium-sized bowl add the flour, baking powder, salt, pepper, and garlic powder. Mix well and set aside. In another bowl combine the buttermilk, egg, and hot sauce using a whisk until fully mixed.
Step 2: Heat the Oil
Fill a heavy-bottom skillet or Dutch oven with about three inches of oil. Heat over medium-low until it reaches approximately 325°F.
Step 3: Dredge the Chicken Tenders
While the oil is heating:
1. Take each chicken tender and dip it into the flour mixture.
2. Ensure it is well-coated then shake off any excess flour.
3. Dip it into the buttermilk mixture next; let any excess drip off.
4. Place it back into the flour mixture for a second coat; press lightly to form a good crust.
Step 4: Fry the Chicken Tenders
Once the oil reaches temperature:
1. Carefully place the coated tenders into the hot oil without crowding the pan.
2. Fry each side for about 3–5 minutes until golden brown and crispy.
3. Check that they reach an internal temperature of 165°F before removing them from the oil.
4. Transfer cooked tenders to a wire rack while finishing the remaining batches.
Now you have delicious Homemade Chicken Tenders ready to enjoy!
How to Serve Homemade Chicken Tenders
Homemade chicken tenders are versatile and can be served in various delicious ways. Here are some serving suggestions that will elevate your meal.
With Dipping Sauces
- Ranch Dressing: A classic pairing, ranch adds a creamy and tangy flavor that complements the crispy tenders.
- Honey Mustard: This sweet and tangy sauce is perfect for those who enjoy a little sweetness with their savory dish.
- BBQ Sauce: Smoky BBQ sauce pairs well with chicken tenders, adding a rich depth of flavor.
In a Sandwich
- Chicken Tender Sandwich: Place a few tenders on a toasted bun with lettuce, tomato, and your favorite sauce for a hearty meal.
- Wrap It Up: Use tortillas to create wraps filled with chicken tenders, veggies, and sauces for a quick lunch option.
On a Salad
- Crispy Chicken Salad: Add sliced homemade chicken tenders on top of mixed greens with your choice of dressing for a satisfying meal.
- Caesar Salad Twist: Replace traditional grilled chicken with crispy tenders in a Caesar salad for added crunch.
As an Appetizer
- Party Platter: Serve your homemade chicken tenders as appetizers at gatherings, accompanied by various dipping sauces for guests to enjoy.
How to Perfect Homemade Chicken Tenders
Getting the perfect homemade chicken tenders takes some practice. Here are essential tips to help you achieve that golden-brown crust every time.
- Use Buttermilk: Soaking the chicken in buttermilk not only tenderizes it but also helps the coating stick better.
- Maintain Oil Temperature: Keeping the oil at around 325°F ensures even cooking and prevents soggy tenders.
- Don’t Overcrowd the Pan: Frying too many tenders at once can lower the oil temperature and lead to uneven cooking. Fry in batches instead.
- Pat Dry Before Dredging: Make sure your chicken is dry before coating; this helps the flour adhere properly.
- Double Dredge for Extra Crunch: For an extra crispy texture, dip the chicken back into the buttermilk after the first coating of flour, then dredge again.
- Let Rest on Wire Rack: After frying, place your tenders on a wire rack instead of paper towels to keep them crisp.
Best Side Dishes for Homemade Chicken Tenders
Pairing side dishes with homemade chicken tenders can enhance your meal experience. Here are some great options:
- French Fries: Crispy fries are always a hit and provide the perfect comfort food pairing.
- Coleslaw: The crunchy texture and tangy flavor of coleslaw balance well with savory chicken tenders.
- Macaroni and Cheese: Creamy mac and cheese offers a delightful contrast to the crispy tenders, making it a family favorite.
- Steamed Vegetables: Lightly steamed broccoli or green beans add nutrition and color to your plate.
- Corn on the Cob: Sweet corn complements the flavors of chicken perfectly; grill or boil it for best results.
- Potato Wedges: Seasoned potato wedges provide another take on fries while still being deliciously crunchy.
Common Mistakes to Avoid
Making Homemade Chicken Tenders can be simple, but there are a few common mistakes that can affect the outcome. Here are some tips to help you avoid them.
- Skipping the Buttermilk: Not using buttermilk can lead to less tender chicken. The acidity helps break down proteins for a juicier result.
- Overcrowding the Pan: Placing too many chicken tenders in the oil at once lowers the temperature. Fry in batches for a crispy texture.
- Ignoring Temperature Checks: Failing to check the oil temperature can result in soggy or burnt tenders. Aim for 325°F for perfect frying.
- Not Patting Dry: If your chicken tenderloins are wet, the flour won’t stick properly. Pat them dry before dredging for better adhesion.
- Under-seasoning: A bland coating can make your tenders unappetizing. Don’t skimp on spices; they enhance flavor significantly.
Storage & Reheating Instructions
Refrigerator Storage
- Store in an airtight container for up to 3 days.
- Allow tenders to cool completely before sealing to prevent moisture.
Freezing Homemade Chicken Tenders
- Freeze cooked tenders in a single layer on a baking sheet.
- Once frozen, transfer to a freezer-safe bag for up to 2 months.
Reheating Homemade Chicken Tenders
- Oven: Preheat to 375°F and bake for about 10-15 minutes until heated through and crispy.
- Microwave: Use the microwave on medium power for 1-2 minutes, but this may make them less crispy.
- Stovetop: Heat in a skillet over medium heat for about 5 minutes, flipping occasionally until warm.
Frequently Asked Questions
Here are some common questions about making Homemade Chicken Tenders that many people have.
How do I make Homemade Chicken Tenders gluten-free?
You can substitute all-purpose flour with gluten-free flour blends or almond flour to keep this recipe gluten-free.
Can I use chicken breasts instead of tenderloins?
Yes, you can cut chicken breasts into strips; just ensure they are uniform in size for even cooking.
What sides pair well with Homemade Chicken Tenders?
These tenders go well with fries, coleslaw, or a fresh salad for a complete meal.
How do I know when my chicken is done?
Check that the internal temperature reaches 165°F using a meat thermometer for safe consumption.
Final Thoughts
These Homemade Chicken Tenders are not only easy to make but also incredibly delicious and versatile. You can customize them with your favorite spices or sauces. Perfect for family dinners or gatherings, give this recipe a try and enjoy homemade comfort food that everyone will love!
Did You Enjoy Making This Recipe? Please rate this recipe with ⭐⭐⭐⭐⭐ or leave a comment.
📖 Recipe Card
Print
Homemade Chicken Tenders
- Total Time: 18 minutes
- Yield: Serves approximately 4 people 1x
Description
Homemade Chicken Tenders are the ultimate comfort food that your family will adore! These crispy, juicy tenders are quick to prepare and perfect for any occasion, whether it’s a weeknight dinner, game night, or casual get-together. Made with simple ingredients you likely have on hand, this recipe delivers a satisfying crunch and customizable flavors that will keep everyone coming back for more. Serve them with your favorite dipping sauces, in sandwiches, or atop salads for a versatile meal that’s sure to impress. Get ready to enjoy the irresistible taste of homemade chicken tenders!
Ingredients
- 1 lb chicken tenderloins
- 1 cup all-purpose flour
- 1 tsp baking powder
- 1/2 tsp kosher salt
- 1/2 tsp black pepper
- 1/2 tsp garlic powder
- 3/4 cup buttermilk
- 1 large egg
- 2 tsp hot sauce
- Oil for frying
Instructions
- Prepare the Coating: In one bowl, mix flour, baking powder, salt, pepper, and garlic powder. In another bowl, whisk together buttermilk, egg, and hot sauce.
- Heat Oil: Pour about three inches of oil into a heavy-bottom skillet or Dutch oven and heat to 325°F.
- Dredge Tenders: Dip each chicken tender in the flour mixture first, then into the buttermilk mixture, and back into the flour for a second coat.
- Fry Tenders: Carefully fry the coated tenders in batches for about 3–5 minutes per side until golden brown and cooked through (internal temperature should reach 165°F). Drain on a wire rack.
- Prep Time: 10 minutes
- Cook Time: 8 minutes
- Category: Main
- Method: Frying
- Cuisine: American
Nutrition
- Serving Size: 4 pieces (approximately 160g)
- Calories: 400
- Sugar: 1g
- Sodium: 600mg
- Fat: 18g
- Saturated Fat: 3g
- Unsaturated Fat: 15g
- Trans Fat: 0g
- Carbohydrates: 30g
- Fiber: 2g
- Protein: 30g
- Cholesterol: 110mg
