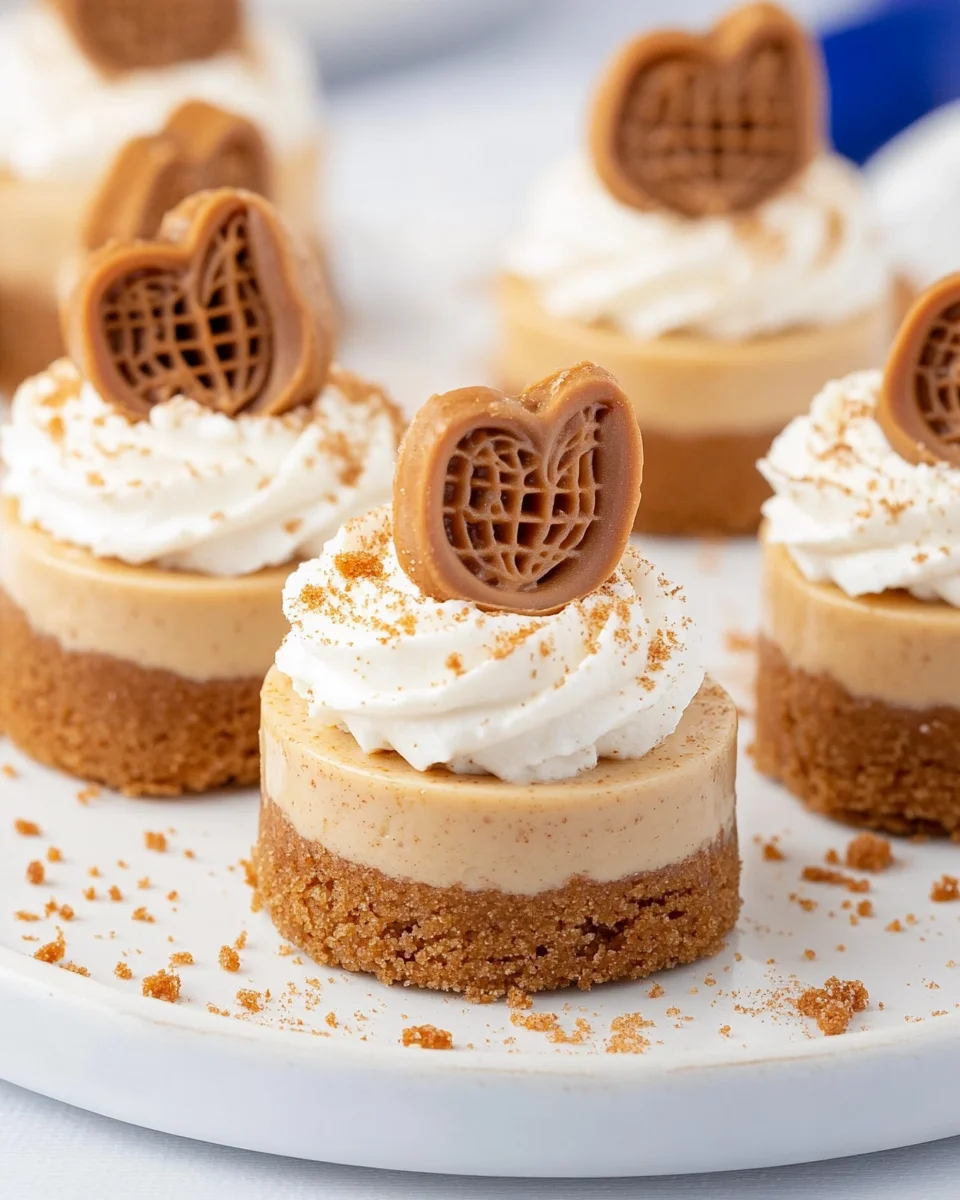
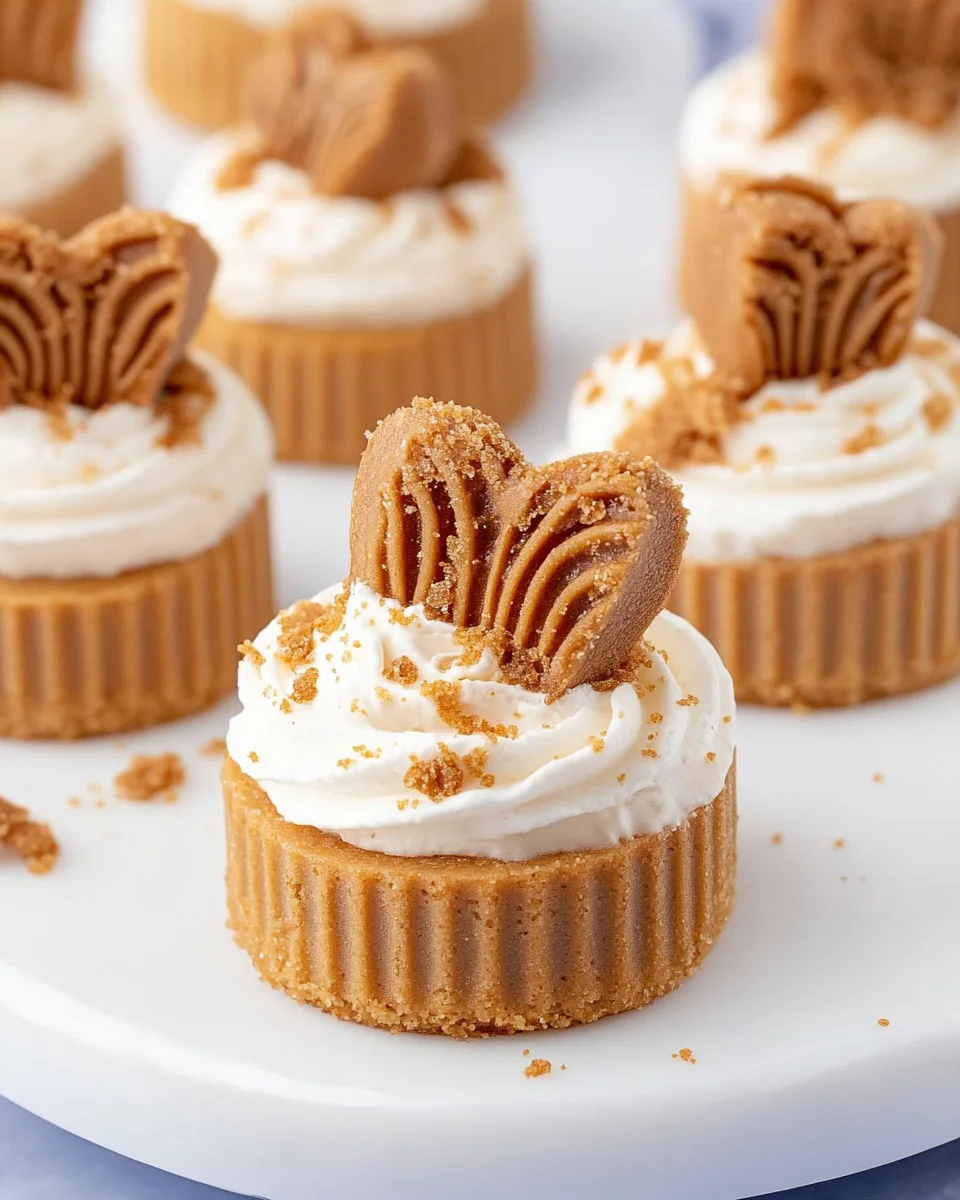
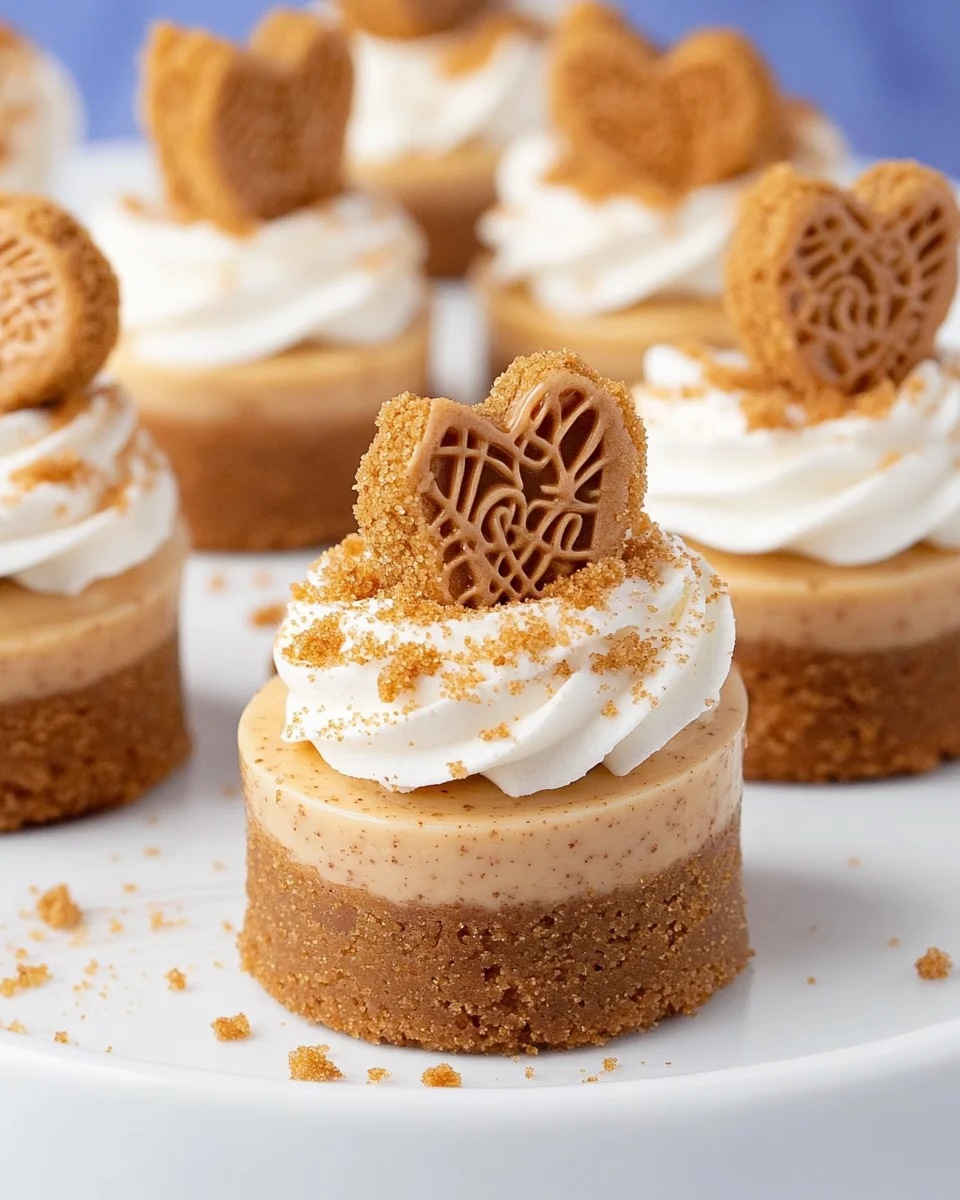
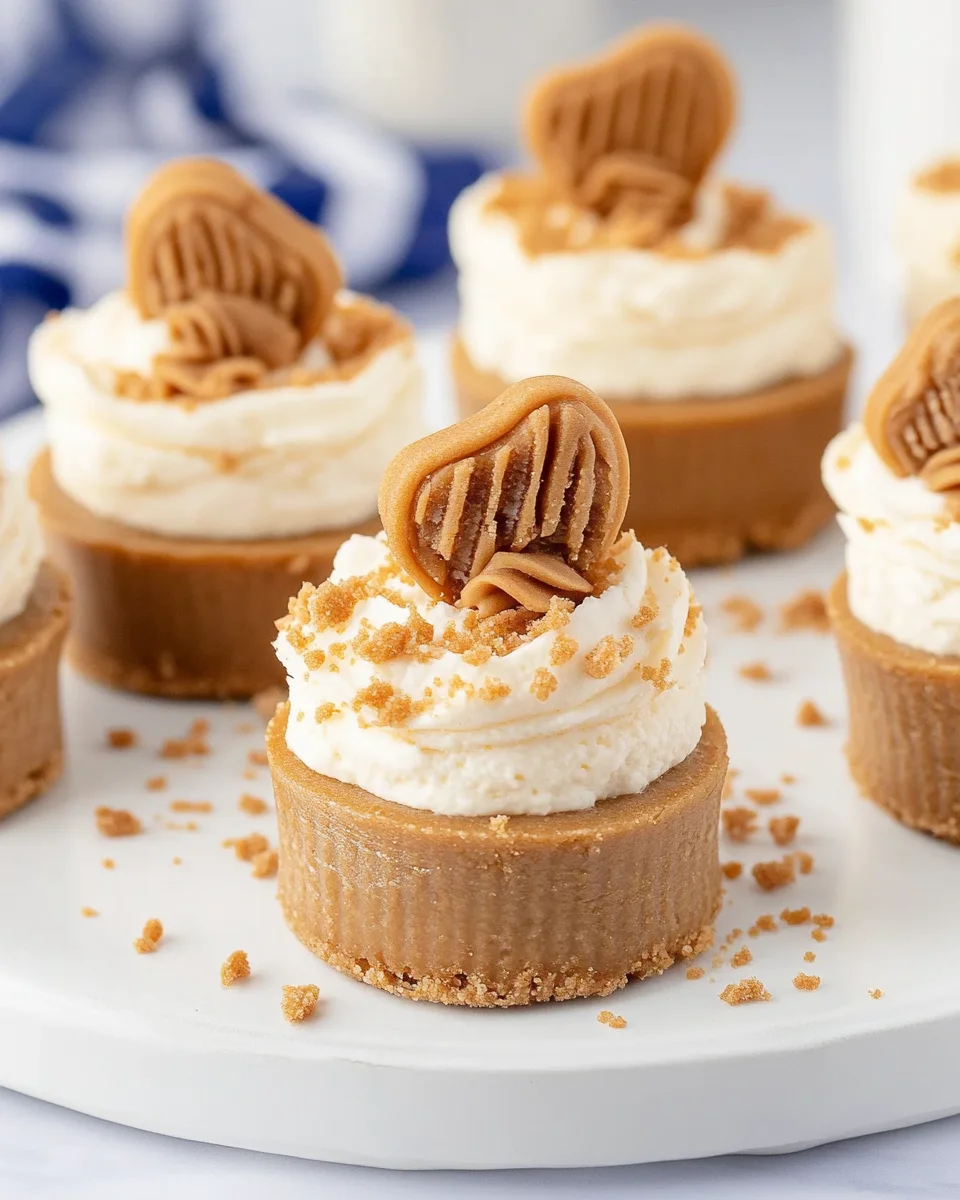
These delightful Mini Biscoff Cheesecakes are a treat for cookie butter enthusiasts! With their crunchy Biscoff cookie crust and creamy cheesecake filling, they make perfect desserts for any occasion. Whether it’s a festive gathering or a simple family dinner, these no-bake mini cheesecakes are sure to impress. Drizzled with melted Biscoff spread and topped with whipped cream, they offer a unique combination of flavors that will leave everyone craving more.
Jump to:
- Why You’ll Love This Recipe
- Tools and Preparation
- Essential Tools and Equipment
- Importance of Each Tool
- Ingredients
- For the Biscoff Cookie Crust
- For the Biscoff Cheesecake Filling
- For the Whipped Cream
- For Additional Toppings
- How to Make Mini Biscoff Cheesecakes
- Step 1: Make the Biscoff Cookie Crust
- Step 2: Prepare the Cheesecake Filling
- Step 3: Assemble and Chill
- Step 4: Make the Whipped Cream
- Step 5: Decorate and Serve
- How to Serve Mini Biscoff Cheesecakes
- Individual Dessert Cups
- Cheesecake Platter
- Dessert Shooters
- Party Favors
- Garnished with Fresh Fruit
- Themed Decor
- How to Perfect Mini Biscoff Cheesecakes
- Best Side Dishes for Mini Biscoff Cheesecakes
- Common Mistakes to Avoid
- Storage & Reheating Instructions
- Refrigerator Storage
- Freezing Mini Biscoff Cheesecakes
- Reheating Mini Biscoff Cheesecakes
- Frequently Asked Questions
- How long do Mini Biscoff Cheesecakes last?
- Can I freeze Mini Biscoff Cheesecakes?
- What if I don’t have a mini cheesecake pan?
- Can I customize my Mini Biscoff Cheesecakes?
- What is the best way to serve Mini Biscoff Cheesecakes?
- Final Thoughts
- 📖 Recipe Card
Why You’ll Love This Recipe
- Easy Preparation: These cheesecakes require no baking, making them simple to whip up even for beginners.
- Decadent Flavor: The combination of cream cheese and Biscoff spread creates an indulgent taste that cookie butter lovers will adore.
- Perfect for Any Occasion: Serve them at parties, holidays, or casual get-togethers for an instant crowd-pleaser.
- Customizable Toppings: Add your favorite toppings like chocolate shavings or fresh fruit for a personal touch.
- Make Ahead Convenience: Prepare these mini cheesecakes in advance and chill overnight for effortless entertaining.
Tools and Preparation
Before you start making Mini Biscoff Cheesecakes, gather your tools. Having the right equipment will streamline your process and help you achieve the best results.
Essential Tools and Equipment
- Mini cheesecake pan
- Mixing bowls
- Electric mixer
- Piping bags
- Measuring cups and spoons
- Rubber spatula
Importance of Each Tool
- Mini cheesecake pan: This specialized pan allows for easy shaping and removal of each mini cheesecake.
- Electric mixer: Ensures smooth mixing of ingredients, especially when whipping cream to the perfect consistency.
- Piping bags: Help create beautifully presented cheesecakes with neat layers of filling and toppings.
Ingredients
For the Biscoff Cookie Crust
- 2 cups Biscoff cookie crumbs
- 2 tablespoons granulated sugar
- 6 tablespoons salted butter, melted
For the Biscoff Cheesecake Filling
- 16 oz cream cheese, room temperature
- 1 ¾ cups powdered sugar
- 1 cup Biscoff spread (cookie butter)
- 2 teaspoons vanilla extract
- 1 cup heavy cream
For the Whipped Cream
- ¾ cup heavy cream
- 2 tablespoons powdered sugar
- ½ teaspoon vanilla extract
For Additional Toppings
- ¾ cup Biscoff spread (cookie butter), melted
- 2 tablespoons Biscoff cookie crumbs
- 12 Biscoff cookies, halved
How to Make Mini Biscoff Cheesecakes
Step 1: Make the Biscoff Cookie Crust
In a mixing bowl, stir together the Biscoff cookie crumbs, granulated sugar, and melted butter until well combined.
1. Portion about 1 tablespoon of the mixture into each cup of a mini cheesecake pan.
2. Firmly press the crumbs down to form the crust. Set aside.
Step 2: Prepare the Cheesecake Filling
In a large bowl, use an electric mixer to beat together the cream cheese, powdered sugar, Biscoff spread, and vanilla extract until smooth.
1. Pour in the heavy cream and whip the mixture on medium-high speed until it thickens and becomes light and fluffy.
Step 3: Assemble and Chill
Fill a piping bag with the cheesecake mixture and pipe it onto the prepared crusts, slightly above the top of the pan.
1. Refrigerate for at least 12 hours or overnight until fully set.
2. After chilling, carefully remove the cheesecakes from the pan.
Step 4: Make the Whipped Cream
In a bowl, whip the heavy cream, powdered sugar, and vanilla extract until medium-stiff peaks form.
1. Transfer to a piping bag fitted with a Wilton 1M piping tip.
Step 5: Decorate and Serve
Melt the Biscoff spread in the microwave for about 30 seconds; then drizzle over the cheesecakes.
1. Pipe a small swirl of whipped cream on top.
2. Sprinkle with Biscoff cookie crumbs and garnish each cheesecake with half of a Biscoff cookie.
How to Serve Mini Biscoff Cheesecakes
Serving Mini Biscoff Cheesecakes is a delightful experience, perfect for any occasion. Whether it’s a party or a casual family gathering, these cheesecakes can be presented in various creative ways.
Individual Dessert Cups
- Serve each cheesecake in its own mini cup for a cute presentation that guests will love.
Cheesecake Platter
- Arrange the cheesecakes on a decorative platter with fresh fruits and chocolate drizzles for an elegant display.
Dessert Shooters
- Layer the cheesecake filling in clear shot glasses with additional Biscoff crumbs for a fun and trendy dessert option.
Party Favors
- Package individual cheesecakes in small boxes or jars as thoughtful party favors for guests to take home.
Garnished with Fresh Fruit
- Top the cheesecakes with berries or sliced bananas to add a fresh touch and vibrant color to your dessert.
Themed Decor
- Align your serving style with themes like birthdays or holidays by using themed decorations around the serving area.
How to Perfect Mini Biscoff Cheesecakes
To achieve the best results when making Mini Biscoff Cheesecakes, consider these helpful tips.
- Use Room Temperature Ingredients: Allow cream cheese and other ingredients to reach room temperature for smoother mixing.
- Chill Thoroughly: Let the cheesecakes set in the refrigerator for at least 12 hours to ensure they maintain their shape when served.
- Whip Cream Properly: Whip the heavy cream until medium-stiff peaks form; this adds lightness and stability to your cheesecake filling.
- Piping Technique: Use a piping bag for filling; this ensures a neat and professional-looking presentation.
- Experiment with Toppings: Don’t hesitate to try different toppings like caramel drizzle or chopped nuts for added flavor and texture.
- Adjust Sweetness: Feel free to modify the amount of powdered sugar in the filling according to your taste preference.
Best Side Dishes for Mini Biscoff Cheesecakes
Pairing side dishes with Mini Biscoff Cheesecakes can enhance your dessert experience. Here are some delicious options that complement their rich flavor.
- Fresh Fruit Salad: A refreshing mix of seasonal fruits balances the sweetness of the cheesecakes perfectly.
- Chocolate Dipped Strawberries: These sweet treats add an indulgent touch while contrasting nicely with the creamy cheesecake.
- Coffee or Espresso: Serving coffee alongside these desserts amplifies their flavor, creating an enjoyable coffee-dessert pairing.
- Vanilla Ice Cream: A scoop of vanilla ice cream provides a creamy contrast that works beautifully with the crunchy cookie crust.
- Nutty Granola: A sprinkle of granola adds crunch and complements the flavors of Biscoff cookies.
- Caramel Sauce: Drizzling caramel sauce over both the cheesecakes and side dishes introduces another layer of sweetness.
Common Mistakes to Avoid
Making Mini Biscoff Cheesecakes can be simple, but there are a few common mistakes that can affect the final result. Here are some tips to help you avoid these pitfalls.
- Ignoring Ingredient Temperature: Using cold cream cheese can lead to lumps in your cheesecake filling. Always ensure your cream cheese is at room temperature for a smooth texture.
- Overmixing the Filling: Mixing too vigorously can introduce air into the filling, which may cause cracks. Mix just until combined and fluffy.
- Not Chilling Long Enough: Rushing the chilling process can prevent the cheesecakes from setting properly. Allow at least 12 hours in the refrigerator for best results.
- Skipping the Crust Pressing: If you don’t press the crust firmly, it may crumble when you serve. Ensure you pack the cookie crust tightly into each cup.
- Using Low-Quality Ingredients: The flavor of your Mini Biscoff Cheesecakes relies heavily on quality ingredients, especially Biscoff spread. Always choose high-quality products for the best taste.
Storage & Reheating Instructions
Refrigerator Storage
- item Store your Mini Biscoff Cheesecakes in an airtight container.
- item They will stay fresh for up to 3 days in the refrigerator.
Freezing Mini Biscoff Cheesecakes
- item Wrap each cheesecake tightly in plastic wrap before placing them in a freezer-safe container.
- item They can be frozen for up to 2 months without losing flavor.
Reheating Mini Biscoff Cheesecakes
- Oven: Preheat to 350°F (175°C), place cheesecakes in a baking dish, and heat for about 10 minutes until slightly warm.
- Microwave: Heat individually for 15-20 seconds on low power. Keep an eye on them to avoid overheating.
- Stovetop: Place cheesecakes in a covered skillet over low heat, warming gently for about 5 minutes.
Frequently Asked Questions
How long do Mini Biscoff Cheesecakes last?
Mini Biscoff Cheesecakes can last up to 3 days in the refrigerator when stored properly.
Can I freeze Mini Biscoff Cheesecakes?
Yes! You can freeze them for up to 2 months. Just wrap each one tightly before freezing.
What if I don’t have a mini cheesecake pan?
You can use a regular muffin tin lined with cupcake liners as an alternative for making mini cheesecakes.
Can I customize my Mini Biscoff Cheesecakes?
Absolutely! Feel free to add different toppings like chocolate or caramel sauce for variety.
What is the best way to serve Mini Biscoff Cheesecakes?
Serve them chilled with additional whipped cream and a drizzle of melted Biscoff spread on top for an extra treat!
Final Thoughts
These Mini Biscoff Cheesecakes are not only delicious but also versatile enough to suit any occasion. You can easily customize them with various toppings or flavors, making them perfect for gatherings or just a sweet treat at home. Don’t hesitate to try this recipe; your taste buds will thank you!
Did You Enjoy Making This Recipe? Please rate this recipe with ⭐⭐⭐⭐⭐ or leave a comment.
📖 Recipe Card
Print
Mini Biscoff Cheesecakes
- Total Time: 0 hours
- Yield: Makes approximately 12 servings 1x
Description
Indulge in the creamy delight of Mini Biscoff Cheesecakes, a no-bake dessert that cookie butter lovers will cherish. With a crunchy Biscoff cookie crust and a luscious cheesecake filling, these mini treats are perfect for any occasion—from festive gatherings to cozy family dinners. Drizzled with melted Biscoff spread and adorned with whipped cream, each bite offers a heavenly blend of flavors that will leave everyone wanting more. Easy to prepare and customize, they make entertaining effortless and enjoyable.
Ingredients
- 2 cups Biscoff cookie crumbs
- 2 tablespoons granulated sugar
- 6 tablespoons salted butter, melted
- 16 oz cream cheese, room temperature
- 1 ¾ cups powdered sugar
- 1 cup Biscoff spread (cookie butter)
- 2 teaspoons vanilla extract
- 1 cup heavy cream
- ¾ cup heavy cream
- 2 tablespoons powdered sugar
- ½ teaspoon vanilla extract
- ¾ cup Biscoff spread (cookie butter), melted
- 2 tablespoons Biscoff cookie crumbs
- 12 Biscoff cookies, halved
Instructions
- In a mixing bowl, stir together the Biscoff cookie crumbs, granulated sugar, and melted butter until well combined. Portion about 1 tablespoon of the mixture into each cup of a mini cheesecake pan. Firmly press the crumbs down to form the crust. Set aside.
- In a large bowl, use an electric mixer to beat together the cream cheese, powdered sugar, Biscoff spread, and vanilla extract until smooth. Pour in the heavy cream and whip the mixture on medium-high speed until it thickens and becomes light and fluffy.
- Fill a piping bag with the cheesecake mixture and pipe it onto the prepared crusts, slightly above the top of the pan. Refrigerate for at least 12 hours or overnight until fully set. After chilling, carefully remove the cheesecakes from the pan.
- In a bowl, whip the heavy cream, powdered sugar, and vanilla extract until medium-stiff peaks form. Transfer to a piping bag fitted with a Wilton 1M piping tip.
- Melt the Biscoff spread in the microwave for about 30 seconds; then drizzle over the cheesecakes. Pipe a small swirl of whipped cream on top. Sprinkle with Biscoff cookie crumbs and garnish each cheesecake with half of a Biscoff cookie.
- Prep Time: 30 minutes
- Cook Time: N/A
- Category: Dessert
- Method: No-bake
- Cuisine: American
Nutrition
- Serving Size: 1 cheesecake (80g)
- Calories: 280
- Sugar: 18g
- Sodium: 210mg
- Fat: 20g
- Saturated Fat: 10g
- Unsaturated Fat: 8g
- Trans Fat: 0g
- Carbohydrates: 24g
- Fiber: 1g
- Protein: 3g
- Cholesterol: 45mg
