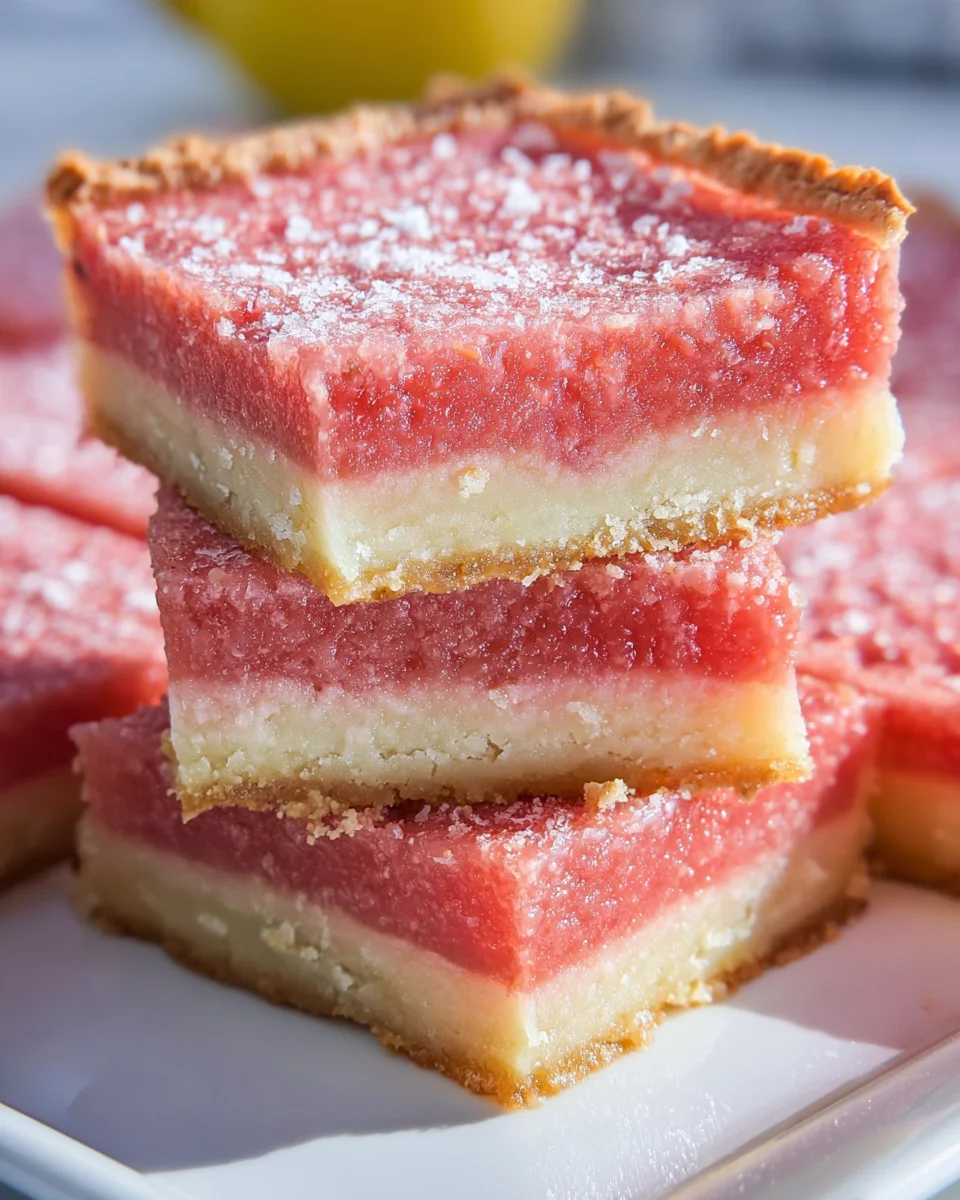
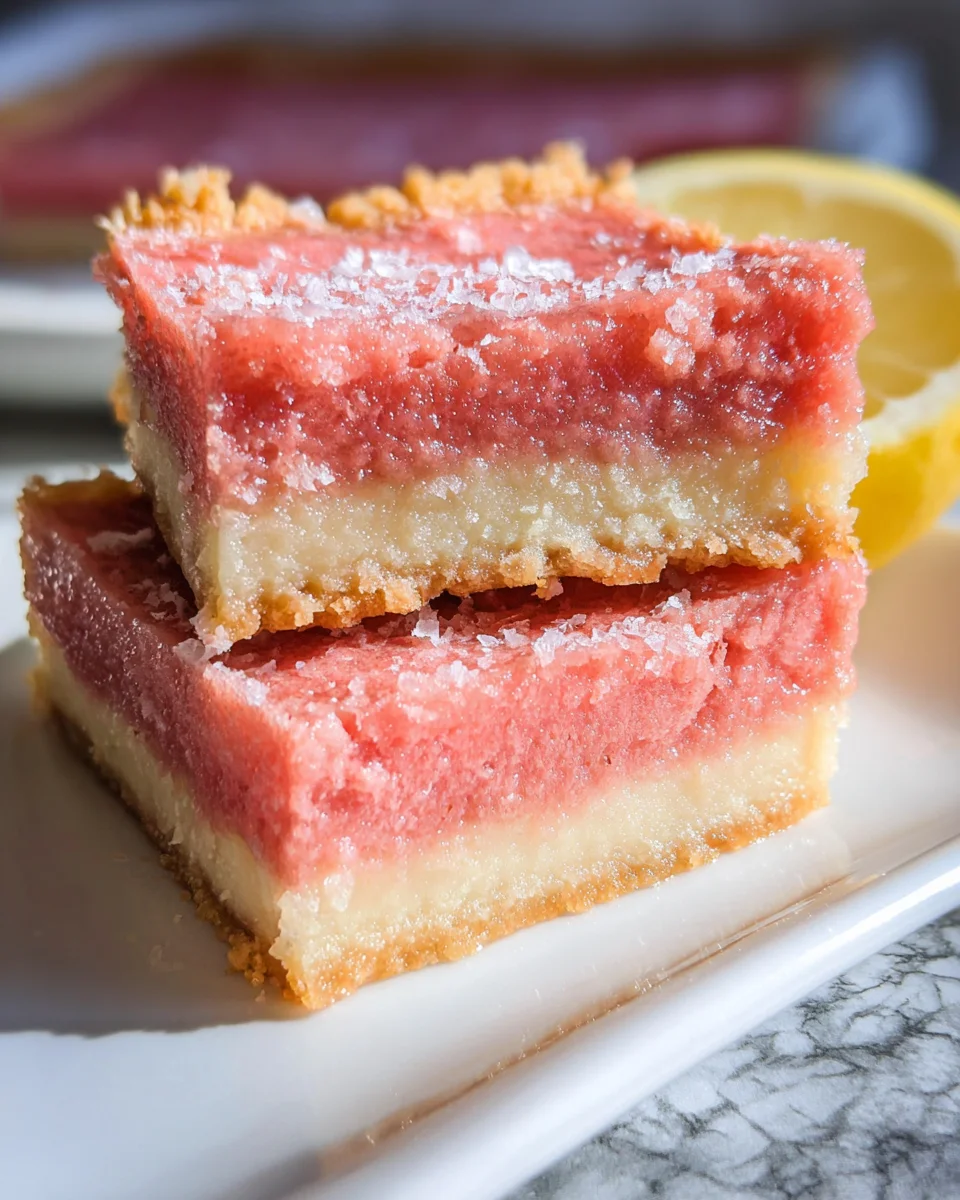
These Pink Lemonade Bars are a delightful treat that beautifully combine sweet and tart flavors. With their vibrant pink hue and refreshing taste, they make for an ideal dessert at summer gatherings, picnics, or just a fun family snack. The subtle hint of raspberry adds a unique twist to the classic lemon bar, making them irresistible to both kids and adults alike.

Jump to:
- Why You’ll Love This Recipe
- Tools and Preparation
- Essential Tools and Equipment
- Importance of Each Tool
- Ingredients
- For the Crust
- For the Filling
- How to Make Pink Lemonade Bars
- Step 1: Preheat the Oven
- Step 2: Prepare the Raspberry Puree
- Step 3: Make the Crust
- Step 4: Prepare the Filling
- Step 5: Bake Until Set
- How to Serve Pink Lemonade Bars
- Perfect for Picnics
- Refreshing Beverage Pairings
- Ideal for Celebrations
- Make it a Dessert Platter
- How to Perfect Pink Lemonade Bars
- Best Side Dishes for Pink Lemonade Bars
- Common Mistakes to Avoid
- Storage & Reheating Instructions
- Refrigerator Storage
- Freezing Pink Lemonade Bars
- Reheating Pink Lemonade Bars
- Frequently Asked Questions
- Can I use bottled lemon juice instead of fresh?
- How do I know when the Pink Lemonade Bars are done?
- Can I customize my Pink Lemonade Bars?
- Are these Pink Lemonade Bars kid-friendly?
- How can I make these bars gluten-free?
- Final Thoughts
- 📖 Recipe Card
Why You’ll Love This Recipe
- Refreshing Flavor: The blend of lemon and raspberry creates a bright and zesty experience.
- Easy to Make: With simple ingredients and straightforward steps, anyone can whip these bars up in no time.
- Perfect for Any Occasion: Whether it’s a summer BBQ or a cozy family dinner, these bars fit right in.
- Kid-Friendly: The sweet and tangy taste appeals to children, making it a great recipe for family cooking.
- Versatile Dessert: They can be served chilled or at room temperature, making them perfect for potlucks.
Tools and Preparation
Before you start baking your delicious Pink Lemonade Bars, gather your tools. Having everything prepared will make the process smoother and more enjoyable.
Essential Tools and Equipment
Importance of Each Tool
- Baking pan: A sturdy pan ensures even baking and helps create the perfect crust.
- Parchment paper: Using parchment paper makes it easy to lift out the bars once baked, ensuring clean cuts.
- Whisk: A whisk is essential for incorporating air into the filling, giving it a light texture.
- Blender or food processor: These tools help create a smooth raspberry puree for that beautiful pink color.
Ingredients
For the Crust
- 1 cup Unsalted Butter, room temperature (2 sticks)
- 2 cups All-Purpose Flour
- 1/2 teaspoon Salt
- 1/2 cup Granulated Sugar
For the Filling
- 1/2 pint Fresh Raspberries (or about 1 cup frozen raspberries, thawed)
- 2 1/4 cups Granulated Sugar
- 6 Tablespoons All-Purpose Flour
- 6 Eggs
- 3 Lemons, juice
How to Make Pink Lemonade Bars
Step 1: Preheat the Oven
Preheat your oven to 350 degrees F (175 C). Lightly grease your 9 x 13 baking pan with butter or oil. Line it lengthwise with parchment paper to make removing the bars easier later.
Step 2: Prepare the Raspberry Puree
Blend the raspberries with 1 tablespoon of water until smooth. Strain this mixture through a sieve to remove any seeds. Set aside while you prepare the crust.
Step 3: Make the Crust
In a mixing bowl, combine unsalted butter, all-purpose flour, salt, and granulated sugar. Mix until smooth. Press this mixture firmly into the bottom of your prepared pan. Bake for about 15 to 20 minutes, or until it begins to turn golden brown.
Step 4: Prepare the Filling
While your crust bakes, prepare the filling by mixing together granulated sugar and flour. In a separate bowl, whisk together eggs and lemon juice. Gradually add in the raspberry puree until you achieve a light pink color. Pour this filling over your baked crust.
Step 5: Bake Until Set
Return the pan to the oven and bake for approximately 25 to 30 minutes. You’ll know they’re ready when the edges pull away slightly from the pan and are lightly browned. The center may still be wobbly but will firm up as they cool. Allow them to cool completely before slicing into triangles for serving.
With these steps followed carefully, you’ll have delicious Pink Lemonade Bars that are sure to impress!
How to Serve Pink Lemonade Bars
Pink Lemonade Bars are a delightful treat that can brighten up any gathering. Their sweet and tart flavor makes them versatile for various occasions, from summer picnics to potluck parties.
Perfect for Picnics
- Packaged Individually: Wrap each bar in parchment paper for easy transport and serving.
- Pair with Fresh Fruit: Serve alongside sliced strawberries or blueberries to enhance the fruity flavors.
Refreshing Beverage Pairings
- Iced Tea: A glass of chilled iced tea complements the citrus notes beautifully.
- Lemonade: Serve these bars with a refreshing glass of homemade lemonade for a double citrus delight.
Ideal for Celebrations
- Birthday Parties: These bars are perfect as a fun dessert option that kids will love.
- Outdoor Gatherings: Their vibrant color makes them an attractive addition to any summer table setting.
Make it a Dessert Platter
- Dessert Board: Arrange Pink Lemonade Bars on a platter with other summer desserts like brownies and fruit tarts.
- Garnish with Mint: Top each bar with a fresh mint leaf for an extra touch of elegance.

How to Perfect Pink Lemonade Bars
Creating the perfect Pink Lemonade Bars involves attention to detail during the preparation. Here are some tips to ensure your bars turn out wonderfully every time.
- Use Fresh Ingredients: Opt for fresh lemons and raspberries for the best flavor and vibrant color.
- Don’t Overmix: Mix your filling just until combined; overmixing can lead to tough bars.
- Check Baking Time: Keep an eye on the edges; they should be slightly golden while the center remains slightly wobbly.
- Cool Completely: Allow your bars to cool thoroughly before slicing to ensure clean cuts and firm texture.
Best Side Dishes for Pink Lemonade Bars
Pink Lemonade Bars pair wonderfully with various side dishes that complement their tangy sweetness. Here are some delightful options to consider:
- Fruit Salad: A mix of seasonal fruits adds freshness and balances the sweetness of the bars.
- Cheese Platter: A selection of mild cheeses can provide a savory contrast to the sweet bars.
- Grilled Chicken Skewers: Lightly seasoned chicken skewers bring protein to your dessert table, making it more balanced.
- Caprese Salad: The freshness of tomatoes, basil, and mozzarella pairs well with the zingy lemon flavor.
- Veggie Tray with Dip: Fresh veggies add crunch and healthiness, balancing out the richness of dessert.
- Pasta Salad: A light pasta salad can serve as a refreshing side that works well alongside these bars.
- Potato Wedges: Seasoned potato wedges offer a hearty touch that contrasts nicely with the dessert’s lightness.
Common Mistakes to Avoid
When making Pink Lemonade Bars, a few common mistakes can lead to less than perfect results. Here are some pitfalls to watch for.
- Using frozen raspberries directly: Always thaw your raspberries before using them. This ensures better blending and flavor in the bars.
- Overmixing the crust: Mix the crust ingredients just until combined. Overmixing can result in a tough texture instead of a flaky one.
- Not cooling before slicing: Allow the bars to cool completely before cutting. Slicing too early can lead to messy pieces.
- Skipping parchment paper: Always line your baking pan with parchment paper. This makes it easier to lift the bars out and cut them neatly.
- Ignoring baking times: Keep an eye on both the crust and filling while baking. Each oven is different, so adjust timing as needed for best results.
Storage & Reheating Instructions
Refrigerator Storage
- Store in an airtight container for up to 5 days.
- Keep the bars separated with parchment paper if stacking to prevent sticking.
Freezing Pink Lemonade Bars
- Freeze for up to 3 months in an airtight container.
- Wrap individual bars in plastic wrap for easier serving later.
Reheating Pink Lemonade Bars
- Oven: Preheat to 350°F (175°C) and warm for about 10 minutes until soft.
- Microwave: Heat in short bursts of 10-15 seconds until warmed through.
- Stovetop: Place bars in a skillet over low heat for a couple of minutes, flipping carefully.
Frequently Asked Questions
Here are some frequently asked questions about Pink Lemonade Bars that might help you while making or enjoying them.
Can I use bottled lemon juice instead of fresh?
While bottled lemon juice is convenient, fresh lemon juice gives a brighter flavor. For best results, use fresh lemons.
How do I know when the Pink Lemonade Bars are done?
The edges should be lightly browned, and the center may still look slightly wobbly. It will firm up as it cools.
Can I customize my Pink Lemonade Bars?
Yes! You can add more raspberry puree for extra flavor or even mix in other fruits like strawberries or blueberries.
Are these Pink Lemonade Bars kid-friendly?
Absolutely! They have a sweet-tart flavor that kids love, making them perfect for parties and snacks.
How can I make these bars gluten-free?
Substitute all-purpose flour with a gluten-free blend that measures cup-for-cup.
Final Thoughts
Pink Lemonade Bars offer a delightful balance of sweet and tart flavors, making them perfect for summer gatherings or any occasion. Their bright pink color adds a fun twist, and you can easily customize them with different fruits or flavors. Give this recipe a try; it’s sure to become a favorite!
Did You Enjoy Making This Recipe? Please rate this recipe with ⭐⭐⭐⭐⭐ or leave a comment.
📖 Recipe Card
Print
Pink Lemonade Bars
- Total Time: 1 hour 5 minutes
- Yield: Approximately 12 servings 1x
Description
Indulge in the vibrant and refreshing taste of Pink Lemonade Bars, a perfect dessert for summer gatherings and picnics. These delightful bars combine the sweet and tart notes of fresh lemons and raspberries, resulting in a colorful treat that appeals to both kids and adults alike. Their easy preparation makes them an ideal choice for family cooking, ensuring you can whip up a batch in no time. Whether chilled or served at room temperature, these bars are sure to brighten any occasion with their eye-catching pink hue and delectable flavor. Enjoy them as a standalone snack or pair them with fresh fruit for an extra burst of flavor!
Ingredients
- 1 cup Unsalted Butter, room temperature (2 sticks)
- 2 cups All-Purpose Flour
- 1/2 teaspoon Salt
- 1/2 cup Granulated Sugar
- 1/2 pint Fresh Raspberries (or about 1 cup frozen raspberries, thawed)
- 2 1/4 cups Granulated Sugar
- 6 Tablespoons All-Purpose Flour
- 6 Eggs
- 3 Lemons, juice
Instructions
- Preheat oven to 350°F (175°C) and prepare a 9" x 13" baking pan with parchment paper.
- Blend raspberries with water until smooth; strain to remove seeds.
- Mix butter, flour, salt, and sugar for the crust; press into the pan and bake for 15-20 minutes until golden.
- Combine sugar and flour for the filling; whisk eggs and lemon juice separately, then incorporate raspberry puree.
- Pour filling over the baked crust and return to the oven for 25-30 minutes until edges are set.
- Prep Time: 15 minutes
- Cook Time: 50 minutes
- Category: Dessert
- Method: Baking
- Cuisine: American
Nutrition
- Serving Size: 1 bar (45g)
- Calories: 200
- Sugar: 16g
- Sodium: 75mg
- Fat: 10g
- Saturated Fat: 6g
- Unsaturated Fat: 4g
- Trans Fat: 0g
- Carbohydrates: 27g
- Fiber: 1g
- Protein: 3g
- Cholesterol: 70mg


