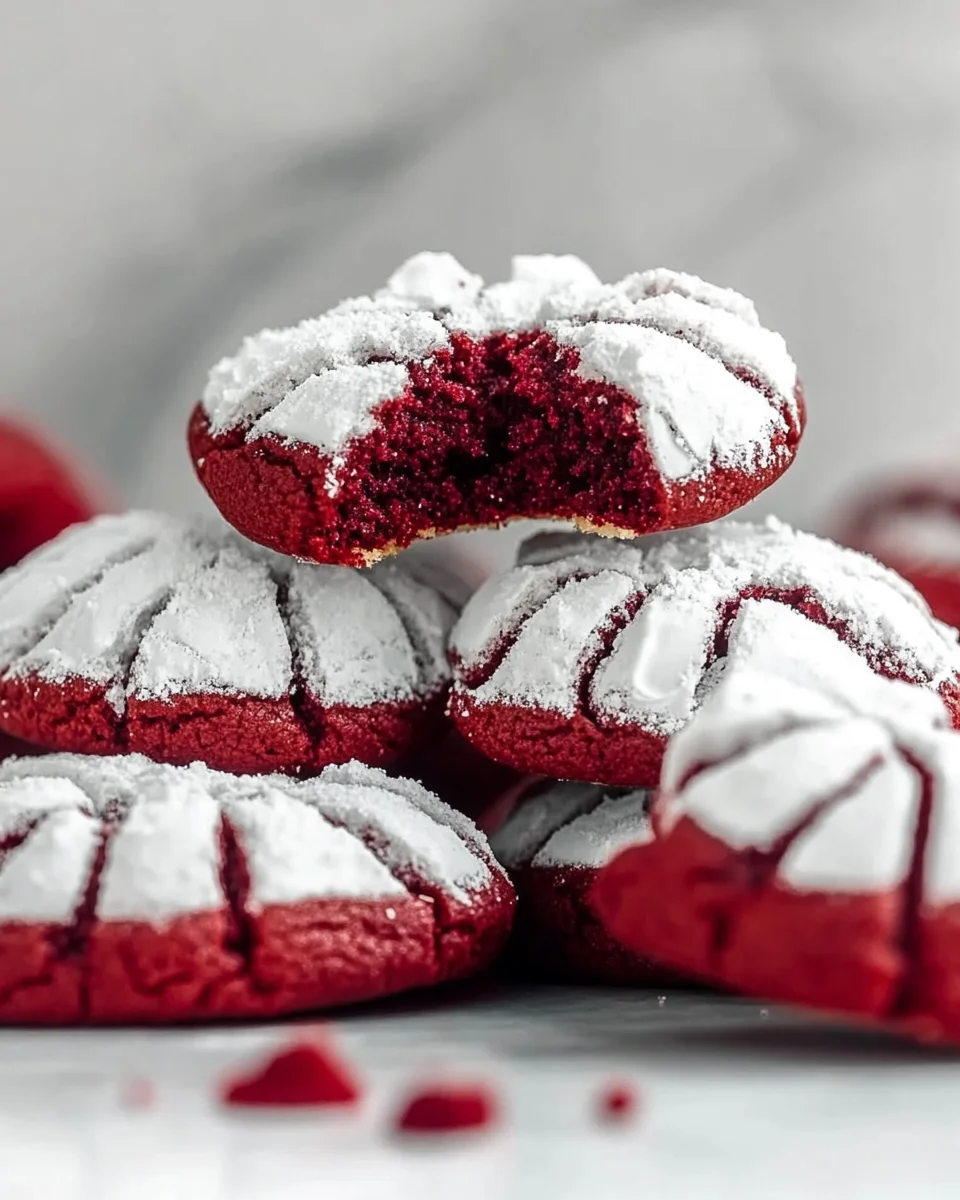
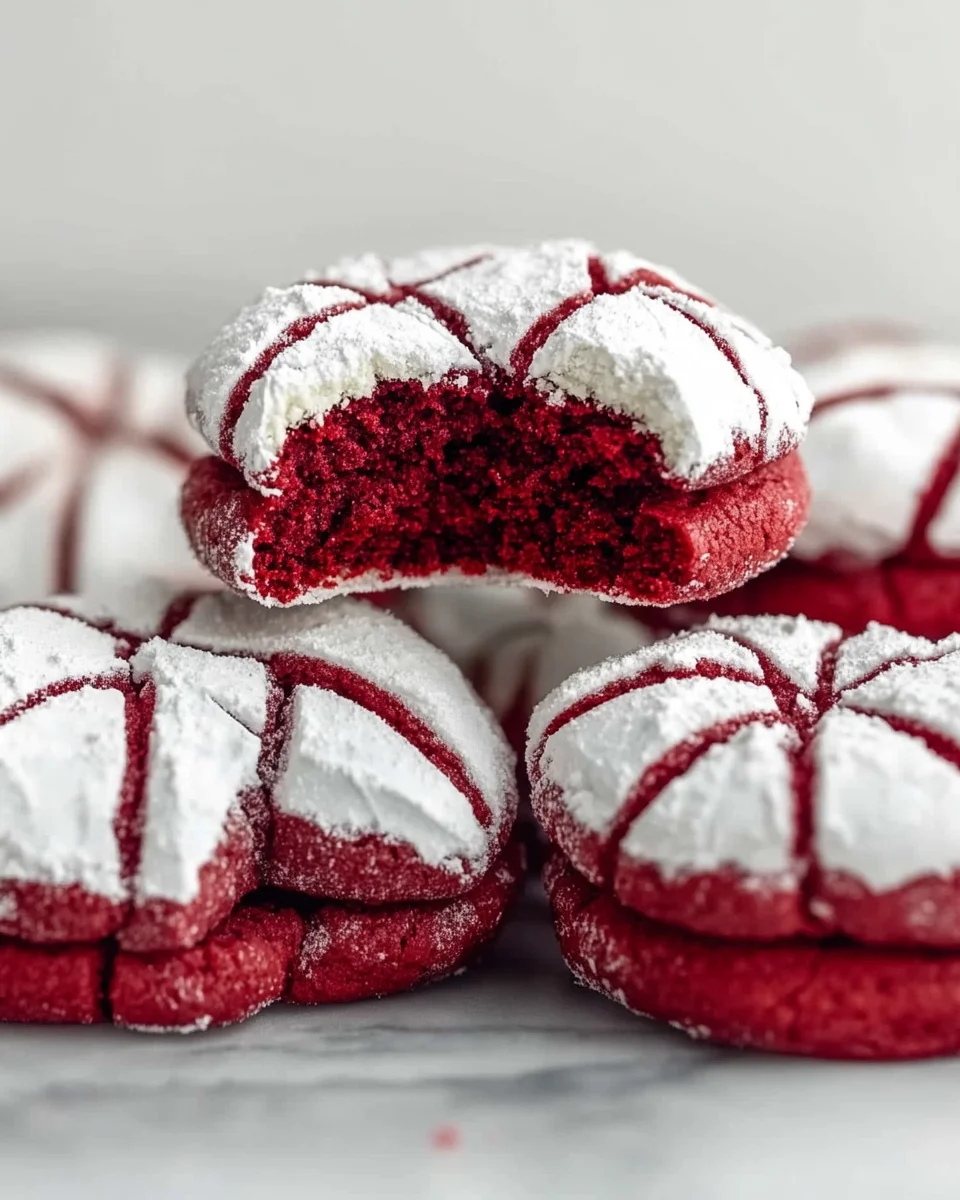
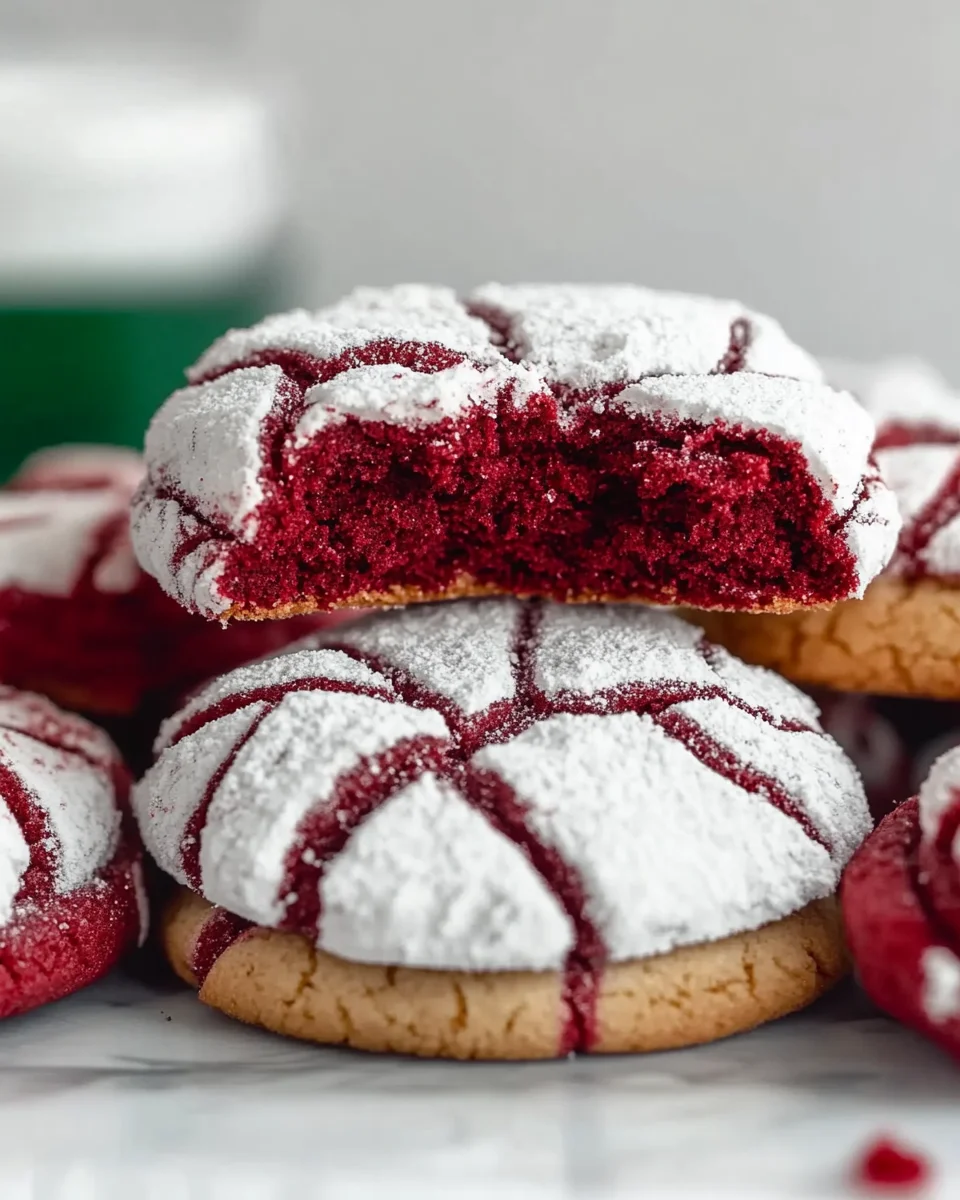
A delightful treat that stands out at any gathering, Red Velvet Crinkle Cookies offer a perfect blend of rich cocoa flavor and a striking appearance. These cookies are not only visually appealing but also wonderfully soft and chewy. Ideal for holidays, birthdays, or simply to satisfy a sweet tooth, their charming crinkles make them a favorite among cookie lovers.
Jump to:
- Why You’ll Love This Recipe
- Tools and Preparation
- Essential Tools and Equipment
- Importance of Each Tool
- Ingredients
- For the Cookies
- For Rolling
- How to Make Red Velvet Crinkle Cookie
- Step 1: Preheat the Oven
- Step 2: Prepare Baking Sheets
- Step 3: Mix Dry Ingredients
- Step 4: Cream Butter and Sugar
- Step 5: Add Eggs and Flavorings
- Step 6: Combine Mixtures
- Step 7: Chill the Dough
- Step 8: Shape Cookies
- Step 9: Bake Cookies
- Step 10: Cool Down
- How to Serve Red Velvet Crinkle Cookie
- Pair with Milk
- Ice Cream Sandwiches
- Festive Platter
- Coffee or Tea Companion
- Gift Packaging
- How to Perfect Red Velvet Crinkle Cookie
- Best Side Dishes for Red Velvet Crinkle Cookie
- Common Mistakes to Avoid
- Storage & Reheating Instructions
- Refrigerator Storage
- Freezing Red Velvet Crinkle Cookie
- Reheating Red Velvet Crinkle Cookie
- Frequently Asked Questions
- What is a Red Velvet Crinkle Cookie?
- How do I achieve the perfect crinkle effect?
- Can I use different food coloring?
- How long do these cookies last?
- Final Thoughts
- 📖 Recipe Card
Why You’ll Love This Recipe
- Easy to Make: With straightforward steps, anyone can whip up these delicious cookies in no time.
- Stunning Presentation: The vibrant red color and crackled surface create an eye-catching dessert that impresses guests.
- Rich Flavor: The combination of cocoa and vanilla offers a decadent taste that satisfies your sweet cravings.
- Versatile Treat: Perfect for various occasions like Christmas parties or birthday celebrations, these cookies fit right in.
- Fun to Customize: Experiment with different food coloring shades for unique variations that suit any event.
Tools and Preparation
To make the best Red Velvet Crinkle Cookies, you’ll need some essential tools. Having the right equipment makes the process smoother and more enjoyable.
Essential Tools and Equipment
- Mixing bowls
- Whisk
- Electric mixer
- Baking sheets
- Parchment paper
- Cookie scoop
Importance of Each Tool
- Electric mixer: This tool helps achieve light and fluffy butter-sugar mixtures quickly, ensuring even incorporation of ingredients.
- Baking sheets: A good quality baking sheet promotes even baking, preventing burnt edges while keeping the cookies perfectly soft.
Ingredients
For the Cookies
- 1 1/2 cups all-purpose flour
- 1/2 cup unsweetened cocoa powder
- 1 teaspoon baking powder
- 1/4 teaspoon salt
- 1/2 cup unsalted butter, softened
- 1 cup granulated sugar
- 2 large eggs
- 1 teaspoon vanilla extract
- 1 tablespoon red food coloring
For Rolling
- 1/2 cup powdered sugar
How to Make Red Velvet Crinkle Cookie
Step 1: Preheat the Oven
Preheat your oven to 350°F (175°C). This ensures that your cookies bake evenly.
Step 2: Prepare Baking Sheets
Line two baking sheets with parchment paper to prevent sticking and promote easy removal of the cookies after baking.
Step 3: Mix Dry Ingredients
In a medium bowl, whisk together:
1. Flour
2. Cocoa powder
3. Baking powder
4. Salt
This creates your dry mixture.
Step 4: Cream Butter and Sugar
In a large mixing bowl, beat the softened butter and granulated sugar until light and fluffy, about 2–3 minutes.
Step 5: Add Eggs and Flavorings
Add the eggs one at a time:
1. Beat well after each addition.
2. Mix in the vanilla extract and red food coloring until combined.
Step 6: Combine Mixtures
Gradually incorporate the dry mixture into the wet ingredients. Mix just until combined; the dough will be soft and slightly sticky.
Step 7: Chill the Dough
Cover the dough with plastic wrap and refrigerate for at least 30 minutes. Chilling helps manage stickiness and shapes effect on cookies.
Step 8: Shape Cookies
Scoop chilled dough into 1-inch balls. Roll each ball generously in powdered sugar to coat completely before placing them on prepared baking sheets with about 2 inches of space between them.
Step 9: Bake Cookies
Bake for 10–12 minutes until set but still soft in the center. Look for that distinctive crackled top!
Step 10: Cool Down
Allow cookies to cool on baking sheets for a few minutes before transferring them to a wire rack to cool completely. Enjoy your delicious Red Velvet Crinkle Cookies!
How to Serve Red Velvet Crinkle Cookie
These delightful red velvet crinkle cookies can be enjoyed in a variety of ways. Whether you’re hosting a party or simply indulging at home, here are some serving suggestions that will elevate your cookie experience.
Pair with Milk
- Classic Choice: Serve these cookies with a cold glass of milk for a nostalgic treat that everyone loves.
Ice Cream Sandwiches
- Decadent Delight: Use two cookies to create an ice cream sandwich. Choose vanilla or cream cheese ice cream for a perfect match!
Festive Platter
- Party Ready: Arrange the crinkle cookies on a festive platter alongside other holiday treats for an eye-catching dessert table.
Coffee or Tea Companion
- Warm Beverage Match: Enjoy these cookies with your favorite coffee or tea. The flavors complement each other beautifully.
Gift Packaging
- Thoughtful Gift: Package the cookies in a decorative box as a sweet gift for friends and family during holidays or special occasions.
How to Perfect Red Velvet Crinkle Cookie
To ensure your red velvet crinkle cookies come out perfectly every time, follow these helpful tips.
- Chill the Dough: Refrigerating the dough is crucial for achieving the desired crinkle effect and preventing spreading during baking.
- Use Quality Cocoa Powder: Opt for high-quality cocoa powder to enhance the chocolate flavor of your cookies.
- Measure Ingredients Accurately: Precision in measuring flour and sugar ensures consistent results and prevents dry or overly sweet cookies.
- Do Not Overbake: Keep an eye on the baking time; removing the cookies just when they’re set will keep them soft and chewy inside.
- Roll Generously in Powdered Sugar: A thick coating of powdered sugar creates the iconic crackled appearance and adds sweetness.
Best Side Dishes for Red Velvet Crinkle Cookie
Red velvet crinkle cookies can be paired with various side dishes to create a well-rounded dessert experience. Here are some delicious options to consider:
- Cream Cheese Frosting: A rich, tangy frosting that complements the flavors of red velvet perfectly.
- Fruit Salad: A refreshing mix of seasonal fruits provides a light contrast to the sweetness of the cookies.
- Chocolate Fondue: Dip pieces of the cookie into warm chocolate for an indulgent treat that takes dessert to another level.
- Whipped Cream: Light and fluffy whipped cream can be served beside the cookies as a dipping option or topping.
- Cheesecake Bites: These creamy bites offer a delightful contrast in texture while maintaining flavor harmony with the cookies.
- Mini Cupcakes: Pair your cookies with mini cupcakes for a fun dessert spread that guests will love.
Common Mistakes to Avoid
When making red velvet crinkle cookies, it’s easy to slip up. Here are some common mistakes to avoid:
- Not Chilling the Dough: Skipping the chilling step can lead to cookies that spread too much. Always refrigerate the dough for at least 30 minutes to maintain shape.
- Overmixing the Ingredients: Mixing too vigorously can lead to tough cookies. Mix just until combined for a tender texture.
- Using Old Baking Powder: Expired baking powder can result in flat cookies. Always check the expiration date for best results.
- Neglecting Oven Temperature: An oven that’s too hot can burn the edges while leaving the center raw. Use an oven thermometer to ensure accuracy.
- Not Measuring Ingredients Properly: Incorrect measurements can ruin your cookie dough. Use measuring cups and spoons for precision.
Storage & Reheating Instructions
Refrigerator Storage
- Store in an airtight container.
- Cookies will stay fresh for up to 5 days.
Freezing Red Velvet Crinkle Cookie
- Place cooled cookies in a freezer-safe container or bag.
- They can be frozen for up to 3 months.
Reheating Red Velvet Crinkle Cookie
- Oven: Preheat to 350°F (175°C). Bake for about 5 minutes until warm.
- Microwave: Heat one cookie at a time for about 10-15 seconds, checking frequently.
- Stovetop: Place in a covered pan over low heat for a few minutes until warmed through.

Frequently Asked Questions
What is a Red Velvet Crinkle Cookie?
A red velvet crinkle cookie is a soft, cocoa-flavored treat with a vibrant red color and a crackled top, perfect for any occasion.
How do I achieve the perfect crinkle effect?
To achieve the signature crinkle effect, chill your dough before baking and roll the balls in powdered sugar generously.
Can I use different food coloring?
Yes, feel free to experiment with other food coloring shades to create various festive cookies!
How long do these cookies last?
Red velvet crinkle cookies can last up to 5 days in an airtight container and up to 3 months if frozen properly.
Final Thoughts
These red velvet crinkle cookies are not only visually stunning but also incredibly delicious. Their rich flavor and soft texture make them a favorite among cookie lovers. Don’t hesitate to customize them with different colors or ingredients; they are perfect for any celebration or simply as a delightful treat at home!
Did You Enjoy Making This Recipe? Please rate this recipe with ⭐⭐⭐⭐⭐ or leave a comment.
📖 Recipe Card
Print
Red Velvet Crinkle Cookies
- Total Time: 27 minutes
- Yield: Approximately 24 cookies 1x
Description
Red Velvet Crinkle Cookies are a stunning and delicious treat perfect for any occasion. With their vibrant red color and signature crackled top, these cookies not only please the eye but also deliver a rich cocoa flavor that is soft and chewy. Whether you’re celebrating a holiday, hosting a birthday party, or simply indulging in something sweet, these cookies are sure to impress. The best part? They are incredibly easy to make and can be customized with different food coloring to fit your event’s theme. Enjoy them on their own or pair them with milk or ice cream for an unforgettable dessert experience.
Ingredients
- 1 1/2 cups all-purpose flour
- 1/2 cup unsweetened cocoa powder
- 1 teaspoon baking powder
- 1/4 teaspoon salt
- 1/2 cup unsalted butter, softened
- 1 cup granulated sugar
- 2 large eggs
- 1 teaspoon vanilla extract
- 1 tablespoon red food coloring
- 1/2 cup powdered sugar (for rolling)
Instructions
- Preheat the oven to 350°F (175°C) and line two baking sheets with parchment paper.
- In a bowl, whisk together flour, cocoa powder, baking powder, and salt.
- In a large mixing bowl, cream the softened butter and sugar until light and fluffy.
- Add eggs one at a time, mixing well after each addition, then stir in vanilla and red food coloring.
- Gradually mix in the dry ingredients until just combined; the dough will be soft.
- Chill the dough for at least 30 minutes in plastic wrap.
- Scoop out dough into 1-inch balls and roll in powdered sugar before placing on the prepared sheets.
- Bake for 10–12 minutes until set but still soft in the center. Allow to cool on wire racks.
- Prep Time: 15 minutes
- Cook Time: 12 minutes
- Category: Dessert
- Method: Baking
- Cuisine: American
Nutrition
- Serving Size: 1 serving
- Calories: 110
- Sugar: 9g
- Sodium: 45mg
- Fat: 5g
- Saturated Fat: 3g
- Unsaturated Fat: 2g
- Trans Fat: 0g
- Carbohydrates: 15g
- Fiber: <1g
- Protein: <1g
- Cholesterol: 20mg
