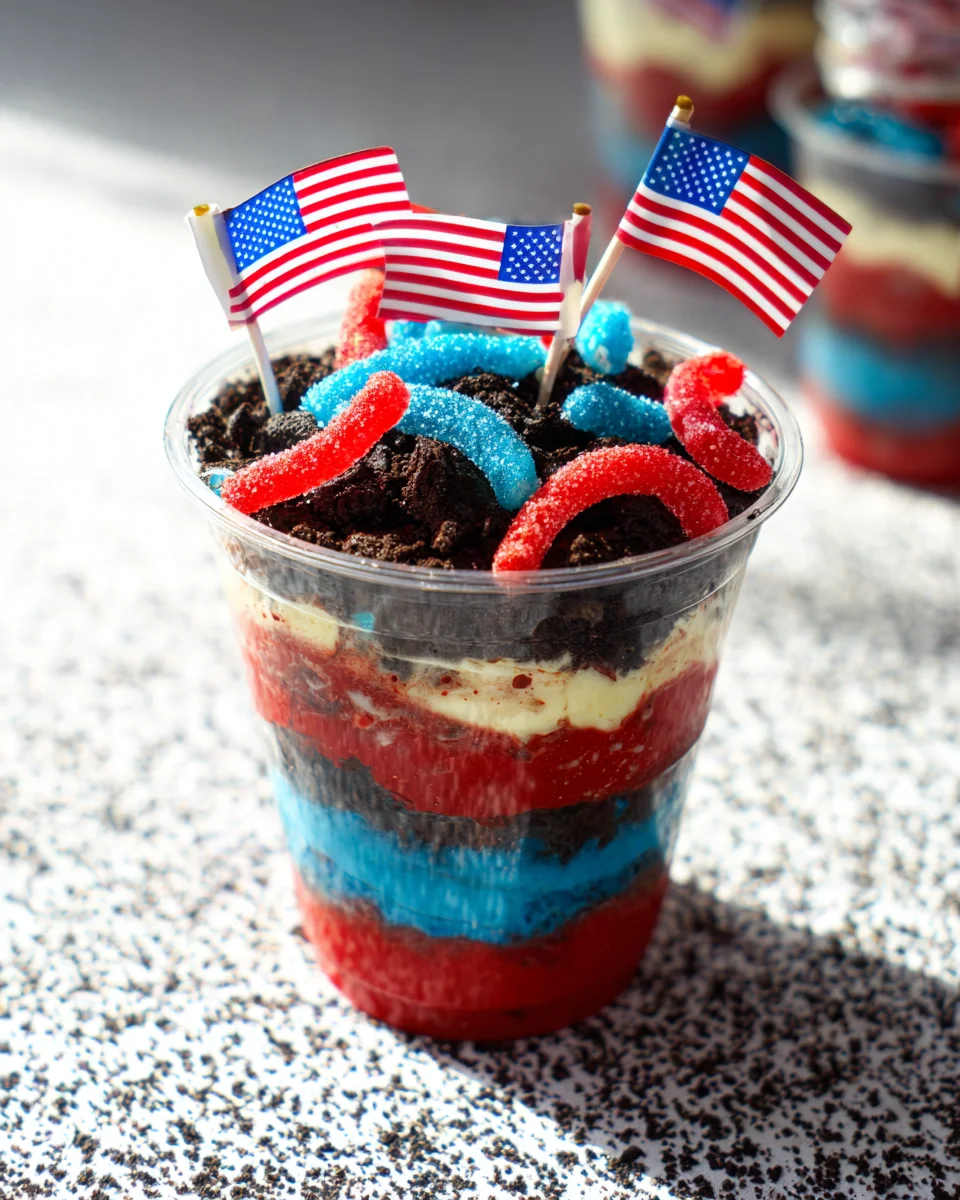
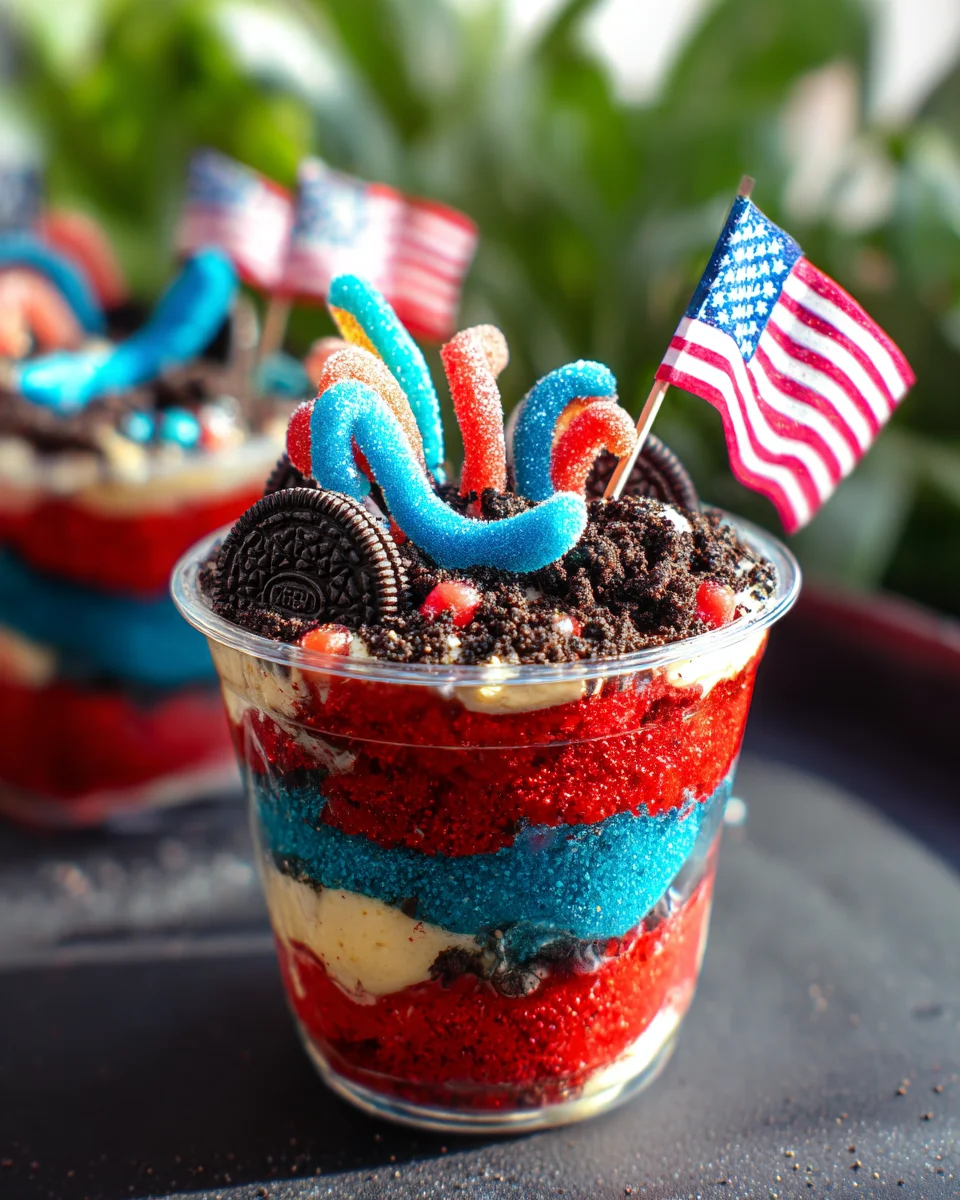
Red, White, and Blue Dirt Cups are not just a delightful treat; they are a stunningly patriotic dessert perfect for the 4th of July and any festive occasion! This easy-to-make recipe combines layers of creamy cheesecake pudding and crunchy Oreos, creating a fun dessert that kids and adults will love. The vibrant red and blue colors make these cups visually striking, ensuring they stand out at any celebration.
Jump to:
- Why You’ll Love This Recipe
- Tools and Preparation
- Essential Tools and Equipment
- Importance of Each Tool
- Ingredients
- Pudding Base
- Layering Ingredients
- Toppings
- Serving Containers
- How to Make Red, White and Blue Dirt Cups
- Step 1: Prepare the Pudding Mixtures
- Step 2: Color the Pudding
- Step 3: Layer Your Cups
- Step 4: Finish with Toppings
- How to Serve Red, White and Blue Dirt Cups
- Individual Cups
- Dessert Platter
- Ice Cream Parlor Style
- Party Favors
- Themed Decorations
- How to Perfect Red, White and Blue Dirt Cups
- Best Side Dishes for Red, White and Blue Dirt Cups
- Common Mistakes to Avoid
- Storage & Reheating Instructions
- Refrigerator Storage
- Freezing Red, White and Blue Dirt Cups
- Reheating Red, White and Blue Dirt Cups
- Frequently Asked Questions
- How long do Red, White and Blue Dirt Cups last?
- Can I customize my Red, White and Blue Dirt Cups?
- Are Red, White and Blue Dirt Cups kid-friendly?
- What occasions are best for serving Red, White and Blue Dirt Cups?
- Final Thoughts
- 📖 Recipe Card
Why You’ll Love This Recipe
- Quick and Easy: With just a few simple steps, you can whip up these delightful cups in no time.
- Kid-Friendly Fun: Kids will enjoy helping with the layering process, making it a great family activity.
- Versatile Dessert: Perfect for the 4th of July, birthday parties, or summer barbecues.
- Delicious Layers: The combination of creamy pudding and crunchy Oreos gives each bite a fantastic texture.
- Customizable Toppings: Feel free to add your favorite candies or fruits to personalize your cups.
Tools and Preparation
Before diving into this fun dessert recipe, gather your tools to ensure a smooth preparation process. Having everything on hand will make the task enjoyable!
Essential Tools and Equipment
- Mixing bowls
- Whisk
- Measuring cups
- Clear plastic cups (9oz)
- Spatula
Importance of Each Tool
- Mixing bowls: Essential for combining ingredients evenly without spills.
- Whisk: Helps achieve a smooth texture in the pudding mixture.
- Clear plastic cups: Perfect for showcasing the beautiful layers of your Red, White and Blue Dirt Cups.
Ingredients
Pudding Base
- Cheesecake Pudding Mix
- Milk
Layering Ingredients
- Oreo Cookies, crushed
- Red & Blue Gel Food Coloring
Toppings
- Red & Blue Gummy Worms
- Flag Cupcake Toppers
Serving Containers
- Clear Plastic Cups, 9oz
How to Make Red, White and Blue Dirt Cups
Step 1: Prepare the Pudding Mixtures
- Place both boxes of cheesecake pudding mix in a large mixing bowl.
- Add the milk to the bowl.
- Whisk until the pudding has thickened.
Step 2: Color the Pudding
- Divide the pudding into two separate bowls:
- Place 1 cup of pudding in one bowl.
- Place 1 ½ cups of pudding in another bowl.
- Add blue gel food coloring to the bowl with 1 cup of pudding. Stir until there are no streaks.
- Add red gel food coloring to the bowl with 1 ½ cups of pudding. Stir until even.
Step 3: Layer Your Cups
- Line up your clear plastic cups on a flat surface.
- Start by adding 1 tablespoon of crushed Oreo cookies to the bottom of each cup. Spread it evenly.
- Top with 2 tablespoons of blue pudding and gently spread it evenly across the layer.
- Add another tablespoon of crushed Oreo on top and spread it evenly again.
- Next, add 3 tablespoons of white pudding as your third layer, spreading it evenly.
- Then add 1 ½ tablespoons more white pudding as another layer, spreading evenly again.
- For the next layer, add 4 tablespoons of red pudding and spread it smoothly across.
- Finally, add 2 tablespoons of crushed Oreo as your last layer on top.
Step 4: Finish with Toppings
- Top each cup with two gummy worms and one flag cupcake topper for that festive touch!
- Enjoy your delicious Red, White, and Blue Dirt Cups!
How to Serve Red, White and Blue Dirt Cups
Red, White and Blue Dirt Cups are not only delicious but also visually appealing, making them perfect for any patriotic event. Here are some creative serving suggestions to elevate your dessert experience.
Individual Cups
- Each guest receives their own clear plastic cup filled with layers of pudding and crushed Oreos. This makes for a fun and personal treat.
Dessert Platter
- Arrange the cups on a large platter for a stunning centerpiece. This allows guests to easily grab their own dessert while enjoying the festive display.
Ice Cream Parlor Style
- Serve alongside ice cream scoops. Pairing with vanilla or strawberry ice cream enhances the flavors and adds a creamy element to the dessert.
Party Favors
- Consider giving away mini versions in smaller cups as party favors. It’s a sweet reminder of the celebration that guests can enjoy later.
Themed Decorations
- Decorate the cups with themed items like small flags or red, white, and blue sprinkles. This adds an extra touch of patriotism to your dessert table.
How to Perfect Red, White and Blue Dirt Cups
To make your Red, White and Blue Dirt Cups truly stand out, consider these helpful tips for perfection.
- Use fresh ingredients: Fresh milk and high-quality Oreo cookies enhance flavor and texture.
- Layer carefully: Take your time when layering the pudding to create distinct colors and layers for a beautiful presentation.
- Chill before serving: Refrigerate the cups for at least an hour before serving. This helps the layers set properly.
- Be creative with toppings: Use whipped cream or additional gummy worms as toppings to add flair and flavor.
- Adjust sweetness: If you prefer less sweetness, reduce the amount of pudding mix or use sugar-free options.
- Make it ahead: Prepare these cups a day in advance, allowing flavors to meld and saving time on the day of your event.
Best Side Dishes for Red, White and Blue Dirt Cups
Pairing side dishes with your Red, White and Blue Dirt Cups can enhance your festive meal. Here are some great side dish options.
- Grilled Corn on the Cob: Sweet corn brushed with butter is a classic summer side that complements any dessert.
- Caprese Salad Skewers: Fresh mozzarella balls, cherry tomatoes, and basil drizzled with balsamic glaze offer a refreshing bite.
- Watermelon Feta Salad: A sweet and salty salad that brings a burst of flavor while keeping things light.
- Patriotic Fruit Salad: Mix strawberries, blueberries, and bananas for a colorful fruit option that ties into the theme.
- Potato Salad: A creamy potato salad adds heartiness to your meal; consider a red skin variety for added color.
- Deviled Eggs: These savory bites are easy to prepare ahead of time and are always a crowd favorite.
- Veggie Platter with Dip: Fresh seasonal vegetables served with ranch dressing provide crunch along with health benefits.
- Cheese and Crackers Board: An assortment of cheeses paired with crackers offers guests something savory before indulging in dessert.
Common Mistakes to Avoid
Avoiding common pitfalls can make your Red, White and Blue Dirt Cups even better. Here are a few mistakes to watch for:
-
Skipping the Pudding Thickness: Ensure the pudding is thick enough before layering. If it’s too runny, the layers will mix and lose their distinct colors.
-
Not Crushing Oreos Properly: Crushed Oreos should be finely broken up. Large chunks won’t create smooth layers and may disrupt the presentation.
-
Ignoring Layer Order: Follow the layering order strictly. Mixing up the colors will affect the visual appeal of your dessert cups.
-
Using Non-Clear Cups: Clear plastic cups are best for this recipe. They showcase the beautiful layers, enhancing the dessert’s overall look.
-
Overloading on Gummy Worms: While gummy worms add fun, too many can overwhelm each cup. Stick to two per cup for balance.
Storage & Reheating Instructions
Refrigerator Storage
- Store in airtight containers or cover with plastic wrap.
- Best consumed within 3 days for optimal freshness.
- Keep refrigerated until ready to serve.
Freezing Red, White and Blue Dirt Cups
- These cups can be frozen for up to 1 month.
- Use freezer-safe containers or tightly seal with plastic wrap.
- Thaw in the refrigerator overnight before serving.
Reheating Red, White and Blue Dirt Cups
- Oven: Not recommended; these cups are best served cold and don’t require reheating.
- Microwave: Avoid microwaving; it will alter the texture of the pudding.
- Stovetop: Not applicable; these are no-bake desserts meant to be served chilled.
Frequently Asked Questions
Here are some frequently asked questions about Red, White and Blue Dirt Cups that may help you make this delicious dessert!
How long do Red, White and Blue Dirt Cups last?
These cups last about 3 days in the refrigerator when stored properly in airtight containers.
Can I customize my Red, White and Blue Dirt Cups?
Absolutely! You can swap out Oreos for other cookies or use different colored candies for various occasions.
Are Red, White and Blue Dirt Cups kid-friendly?
Yes! This dessert is perfect for kids. They’ll love helping layer the ingredients and adding gummy worms.
What occasions are best for serving Red, White and Blue Dirt Cups?
These delightful cups are ideal for Fourth of July parties, Memorial Day picnics, or any patriotic celebration!
Final Thoughts
Red, White and Blue Dirt Cups are an appealing dessert that combines fun flavors with a vibrant presentation. Their versatility allows you to customize them for any occasion. Try them out and let your creativity shine through!
Did You Enjoy Making This Recipe? Please rate this recipe with ⭐⭐⭐⭐⭐ or leave a comment.
📖 Recipe Card
Print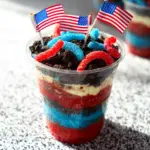
Red, White, and Blue Dirt Cups
- Total Time: 20 minutes
- Yield: Serves 6
Description
Red, White, and Blue Dirt Cups are the ultimate patriotic dessert for summer celebrations! These delightful layered treats combine creamy cheesecake pudding with crunchy Oreos, creating a fun and visually striking dessert perfect for the 4th of July or any festive occasion. With vibrant red and blue hues, these cups not only taste delicious but also look stunning on any dessert table. Easy to prepare and customizable, they’re a hit with both kids and adults alike. Gather your family and friends for a fun activity layering these delightful cups, then enjoy each colorful bite together!
Ingredients
- Cheesecake pudding mix
- Milk
- Oreo cookies (crushed)
- Red and blue gel food coloring
- Red and blue gummy worms (for topping)
- Flag cupcake toppers (for decoration)
Instructions
- In a large mixing bowl, whisk together the cheesecake pudding mix and milk until thickened.
- Divide the pudding into two bowls; add blue food coloring to one and red to the other, mixing until evenly colored.
- Layer in clear plastic cups: start with crushed Oreos, followed by layers of blue pudding, more Oreos, white pudding, red pudding, and top with crushed Oreos.
- Finish each cup with gummy worms and flag toppers for a festive touch.
- Prep Time: 20 minutes
- Cook Time: 0 minutes
- Category: Dessert
- Method: No-bake
- Cuisine: American
Nutrition
- Serving Size: 1 cup (180g)
- Calories: 290
- Sugar: 24g
- Sodium: 150mg
- Fat: 12g
- Saturated Fat: 6g
- Unsaturated Fat: 5g
- Trans Fat: 0g
- Carbohydrates: 41g
- Fiber: 1g
- Protein: 4g
- Cholesterol: 20mg
